


We are spoiled rotten when it comes to our food and it is 100% my fault. Our standards have been raised so high that we are akin to food snobs now. Not in the sense that the food needs to be expensive and fancy but in terms of being organically grown and from heirloom seeds. Those kind of snobs. And now it has morphed over into our ‘fast food.’ Those wonderful heat-and-eat, grab and go meals that you buy at the store just don’t measure up since I started making my own.
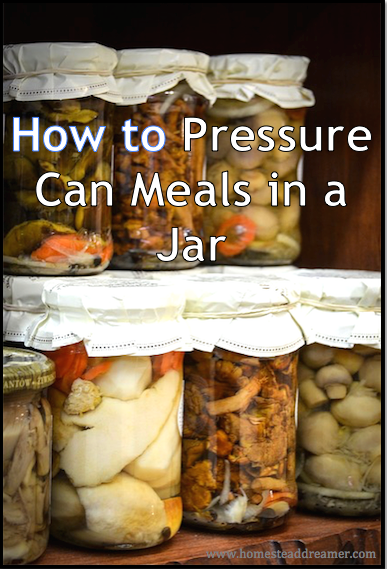
I, like most homesteader/prepper type people, have seen the dehydrated meals in a jar that are vacuum sealed up but what about those wonderful heat-and-eat ones like you can buy in the store? Sometime early last year, I decided that I would try my hand at jarring up actual meals into pint jars for a quick lunch or quart sizes that Mister Dreamer and I could open up after a particularly long day at work. I started out simply enough: making large pots of some of our favorite soups and then simply pressure canning them up but I wanted something more. I wanted to be able to pop open a jar of fully cooked and safe food that I could heat up and eat or, if need be, just open and eat right away. Thus began my journey and I do believe I have it down to a science.
I almost feel guilty because of how incredibly easy it is. I never posted about it because I figured people would be let down that there isn’t some magical or particularly complex secret to making your own! Another reason is I don’t measure things out. The only time I use measuring cups or spoons is when I am using a cookbook so it can make it a little hard to describe how I make something that tastes amazing but can’t give defined amounts of spices. I will endeavor to do my best here and encourage you to explore and play with the spices that suits your family’s tastebuds.
BASIC MEALS IN A JAR
**The following is based on the use of pint jars and a mid-sized pressure canner. My Presto 23qt canner holds 16 pints. This also assumes that you know how to pressure can and have some confidence in your abilities.**
- 1-2 Pounds of Meat – Chicken, Pork, or Beef, Venison, etc – cubed
- Veggies – This is a very personal choice and some veggies will not hold up to the longer canning times required. I use carrots, potatoes, celery, onion, garlic, green beans, etc. They are cut thicker because thin slices of potatoes and carrots can cook away during processing.
- Dry Beans – Pinto, Kidney, Black Eye, etc. I prefer using pinto. Do not pre-soak beans but be sure to check them for any bad beans.
- Stock or Water – I make my own vegetable stock but you can use water or store bought stock flavors. Mind the salt content. You can always add it later but taking it away is much harder.
- Spices – To your taste. I usually put some fresh onions and garlic in the jars with a little pepper. I have also used spice blends like a dash of Montreal Steak Seasoning (which is AMAZING) to give some variety. No matter how much you like garlic beef, 16 pints of it is enough to make anyone sick of it and yes, that is experience talking. 😉
PROCESSING
 When pressure canning any combination of foods, the overall time for processing should be based on whichever takes the longest. Because there is meat involved in these jars, we use the processing time of 75 minutes for pints and 90 minutes for quarts. Be sure to consult your pressure canner’s instructions for specifics on pressure/processing times for your elevation. We live right at sea level so our goal is 11 pounds of pressure.
Make sure your jars are clean before starting but you don’t need to heat everything up to start out. Have warmer water inside the pressure canner but you do not need to have it boiling hot. I have done both hot and cold pack methods when making my meals in a jar and have found that it is faster and easier to do the cold, raw pack.
Assuming you have everything chopped/cubed and ready to go, line up the jars and start the assembly line. While you are filling the jars, gets your lids in hot water to soften the seals. You can fill the jars however you want to! Play, experiment, and let your diabolical side play a little. For me, I prefer to do things in layers to more easily gauge how much of each ingredient I have. Here is the general way I fill my jars.
- 1/3rd cup dry pinto beans (for a pint jar)
- 4-6 2 inch meat chunks
- A layer of onions and garlic
- A healthy layer of potatoes
- A layer of carrots and green beans
- A little celery
- Spices on top
Many people put spices on the bottom but I prefer for them to be on top so there is less chance of them being ‘stuck’ at the bottom during processing. Add your preferred stock or simply add in hot water. Be sure to mix it up a little! You can increase the beans to 1/2 cup, add meat and some garlic/onions and call it good. Variety is really important and it makes it fun to play around with. This is also a really fantastic way to use up some of the vegetables that are starting to get a little old or meat that has been in the freezer and needs to be used up before it goes bad.
TIPS, TRICKS, AND MISTAKES TO AVOID
I learned the amount of beans to put in pint jars through trial and error. I always try to make sure my canner is full when I run a batch so when it comes to canning up jars of meat, I would fill any spots with jars of pinto beans to be used in soups, stews, chili, and making refried beans. Simply put, always put less than you think you can get away with. Putting too many dry beans into the jar will result in either a jar that doesn’t seal or semi-burnt beans that are above the water/stock line.
Trimming the fat from your meat is very important. If there is too much fat, it can cause the seal to fail because the oils won’t allow the rubber to grip the jar. A little fat is good and even important for flavor but large chunks should be cut away.
Rice or lentils are not recommended for making meals in a jar. Yes, they will be fully cooked but they will also turn to mush in the bottom of the jar. They are still 100% edible (and tasty at that) but as far as texture and aesthetics go, you may want to skip them.
Don’t make an entire batch exactly the same unless you are doing multiple batches so you can change up the flavors!
Sage is not recommended for canning spice. It can turn bitter and ruin all the flavors (by overpowering) so all you taste is the sage. There are varying opinions on this but when I tested it, I learned that the advice was dead on. Bleck!
We only buy meat twice a year, when on sale. After the meat reaches the one year mark in the freezer (we repackage and vacuum seal it), it is taken out and canned up into either jarred meat or these meals. It saves a lot of money and makes your food stretch out a long time.
CONCLUSION
This is just one of the ways you can take back control over how your food is processed and what goes into the final meal. It is very easy to make large pots of soups and chili for dinner and then pressure jar them up the next day for even more heat-and-eat meals in a jar. Do you have any favorites? Give us a comment below with questions and ideas!
I love my pressure canners. I can can almost anything and I love it! Getting the eldest and her hubby a 23 quart canner for Christmas. Plan on visiting in January so can teach them how to pressure can. WooHoo! Seriously, I can’t hardly wait.
Thank you for the comment! I would be incredibly excited about that, too. What wonderful memories!
I have been wanting to teach people who are interested in learning to can lately. I am hoping to do a community class and teach people how to first water-bath can and then pressure can. Trying to find a place that has the proper certified kitchen and parking space.
I would love to hear from you directly. I am still in the beginning stages of water bathing (mainly vegetables and fruit). I just made my first batch of lemon preserves and marmalade yesterday (for the first time ever doing it, they didn’t turn out bad). However, I also want to start doing as you described above, processing entire meals at a time. I am one of those who never learned to cook small lol, and with two teenage boys at home, this is something that is truly needed.
Any advice and wisdom is always welcome 😀
Hello! Congratulations on your successes, lemon marmalade sounds delicious! Two things here:
1. I have edited your comment so that your email address isn’t just out there.
2. I have sent you an email directly but it may be in your Social tab.
Also, you (and anyone else) can always send me a message on Facebook and I will respond and help however I am able. Thanks for the comment and interest. Let’s get those meals started!
Thanks for all your great tips and methods!
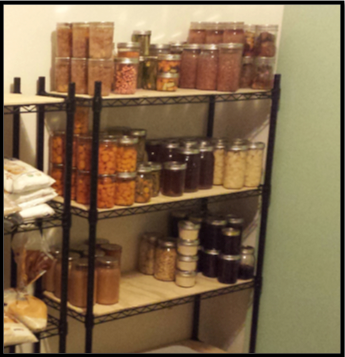
Noticing your photo of neatly shelved GLASS canned stores, I was curious to note also that you live in EARTHQUAKE country. I do too. A few years back when we first moved to coastal Oregon, I came across a cautionary note not to shelve GLASS canned goods very far off the ground in case of earthquake.
Wishing you many quake-free years ahead!
Hi Kristin! Yes, we do indeed live on the Rim of Fire however, our earthquakes are small, few, and far between. In my life growing up here, I think I have felt all of three so don’t worry too much about it. We also live on the upper floor of a duplex so it would all come crashing down anyway. 😉 I admit I am a little lazy and loove seeing all those glass jars stacked pretty on the shelf. I may even glance in at them when I walk by the room, haha!
It brightens my day to know that you have enjoyed my articles and tips as I try to learn and share all of these skills. I’m sitting on the porch on a beautiful early Fall morning with birds singing in the trees and squirrels chattering at my dogs. Thinking about people all across the country reading my words is pretty cosmic for a Southeast Alaskan Island girl. Thank YOU again for the comment and many quake free years right back to you!
Stacking jars is a bad idea. My shelves are similar to what are pictured here on this page, but I had my husband build a shelf and sometimes 2 shelves within the shelves, to keep the jars from being stacked on each other. Love all the other ideas and advice given here. Thanks!
I do what I can, when I can. No pun intended haha. 😉
Just wondering WHY you don’t soak beans first: soaking allow the gas to be offset so it doesn’t cause gastric issues.
Thanks for a great article!
Hi Carol! Thanks for the comment and excellent question! The reason I don’t is because if they are soaked and then pressure canned for 75 minutes at 11 pounds of pressure, they turn to mush. Also, because they are under all that pressure and cooked at such a hight temp for so long, the gasses are released before they seal. We have noticed no extra…discomfort from eating them cooked this way.
I’m also lazy and you don’t need to presoak them when processing this way. Fully cooked beans in 75 minutes? Sign me up! 🙂
i would like to find out how long you pressure the fully cooked stews and chili. Thank you for your article I really enjoyed it.
Thank you for the comment/question! According to the Ball Book of Canning, you basically pressure can them as if they were raw. The downside of this is that the beans will be mushy in a chili since it was already cooked, etc. If it has meat, quarts are 90 minutes and that is the ‘approved’ times. The pressure depends on your canner and what elevation you are located at.
For my family, I pressure can stew and chili that has already been cooked for an hour at 11 pounds of pressure. It is the choice I have made for my family and I do not claim to be an expert in any of this. 🙂
This may help, too! http://theprepperproject.com/tips-canning-homemade-soups-stews-chili/
Just found your blog, and really like this first article I just read. I thought I was the only person to fill out their canner with jars of pinto beans. I never let the canner process without a full load, and beans are the easiest and quickest way to fill out the canner. Love your ideas on the ready to eat meals. I hope to try some when I have a chance, later this fall, or during the winter months. Crazy busy right now with canning apple-everything! Look forward to reading more of your blog in the future. Thanks!
Thank you for the comment! The pinto bean idea came from a book called “I Can Can Beef!” and I have used that tip ever since. I hope you find other articles as fun and interesting. The meals in a jar are really wonderful – especially on those days when you just don’t want to cook something or as quick and easy lunch to keep in your desk at work. When you get to that point of making them, I would LOOOVE a picture to share with the fans on Facebook (and show off your work and skill). Take care!
Hi there. I love the idea of meals in jars. I have done hamburger soup and chili from leftovers and they canned up beautifully. I did chicken soup with layers like you do and it was also super – I love this when I’m under the weather; it’s healthier and more personalized than any chicken soup from the store.
Another thing I can up is ground beef. I cooked it gently to get some of the fat off and put it in jars and topped up with hot water. This is a really good all-purpose ingredient – I have since learned that it can be done without the water and that’s next on my list. The ones I did ended up tasting a lot like the cans of corned beef available at the store. I like it added to pasta, hash (fried potatoes), and also I make a dish with the beef, canned pork and beans, vegetables, rice, and cheese.
The best use I have of meals in jars is when we go camping or to our off-grid getaway. The jars don’t need refrigeration and heat up easily.
There is no prettier sight than rows of Mason jars filled with the bounty of the harvest and a homemaker’s handiwork.
I am always on the lookout for more ideas for meals in jars. Like others, it’s often trial and error and I use what I have – I do sometimes put rice or lentils in mine as I figure the mushiness is a small price to pay for the extra nutrition.
Thank you so much for the comment! I LOVE all the different things you do and would like to try them out, too. I haven’t done hamburger yet but that is on the list.
I cannot agree with you more about the sight of all those Mason jars and we, too, love the convenience of popping open a jar, heating and eating the homemade meals. I did rice and lentils in one but as you mentioned, they were pretty mushy. From a nutritional standpoint, I agree. I like my jars to look pretty, though the added food being preserved is a plus, too!
Can you can cooked red beans
Absolutely! You would pressure can them up the same as you would with dry beans except that since they are already cooked, you don’t need to worry about them expanding in the jars. That means you can fill em up (leave 1 inch headspace!) with beans and liquid and pressure can away! When I am doing jars of pinto beans, and they are dry, I only put in a slightly heaping 1/3rd cup and the rest is stock because of how much they expand. Happy canning and thanks for the question!
You mentioned above that you use 1/3rd cup of dry beans…but, is this for a pint or a quart jar? 🙂 Thanks!
Oh! Thank you for pointing that out. It’s for a pint jar.
While I have done “normal” canning I have never done pressure canning. Mom and I have cooked meals in a pressure cooker but never have canned. Is this easier or a better way to can??? I usually just freeze meals.
The difference between water bath canning and pressure canning is simple: high acid foods can be water bath canned because the acid prohibits bacteria from growing that can make you sick. Low acid food (like meats, beans, etc) must be pressure canned to ensure that any bacteria is dead so you won’t get sick. The pressure brings the jars and contents up to a higher temperature than can be accomplished with boiling water alone.
From a preparedness standpoint, I find it very convenient to have meals I can just heat and eat PLUS they are shelf stable foods – no refrigeration is needed. We get some pretty bad storms here that can knock power out, etc. It is comforting to know I have some food that is not reliant on electricity to keep edible. It is not ‘easier’ per se. It takes more time but I find the trade off VERY worth it. Thanks for the question and comment!
I aam,so,3 cited about finding thos,information. I enjoy the newly learned canning meals,in a,jar. I have canned chili, chicken with onions & celery
Great for chicken soup or chicken N rice casserole. I am going to can pork roast next. I put up a corn chowder with ham that is delicious. Want to try some dry beans love the idea of opening a,jar of beans ready to eat. Thanks again, love this new found adventure.
I have canned for years and absolutely love seeing jars of the various bounties harvested. It is like looking at a painting to me, beautiful art. I can all types of soups into pint jars, perfect for two servings. Whenever I make a homemade soup recipe, I make enough to plan on canning, have some for dinner that day and can the rest for “ready to eat” meals throughout the year. I also can sloppy joes, BBQ pork, and shredded chicken ready for buns; swiss steak, hamburger gravy, chicken pot pie filling, and coleslaw. I began thinking how to can most every meal I cooked so I could have that all day slaved over the stove taste but ready to eat in just minutes. It is great to just grab a jar and dinner is ready.
I didn’t can this summer, was to disappointed from the summer before. I hot water bathed my veggies, and lost alot due to my lids popping up into a v shape. Any idea what I did wrong? Tia
Hi! First, vegetables are a low acid food and should be pressure canned, not water bath canned. There are certain exceptions but green beans, for example, is one that absolutely should be pressure canned.
As far as the lids being wonky, there are a couple of reasons it could have done that. First, they could have been in the canner for too long. Also, cheaper lids (like the walmart brand) tend to pit or seal in odd ways. I learned my lesson in getting cheaper lids with something similar. I had an entire batch of pickles that had to be tossed out for the same reason. The lids compacted down so hard that they pitted and caused the seal to fail.
This may help out some! http://www.homesteaddreamer.com/2014/10/08/complete-newbie-confident-canner/
Hurrah for the canning newbies! After almost 50 years of canning, I am so glad to see a renewed interest in caring for oneself. On the rare day of the blahs, I simply go to my larder and enjoy the color, the variety and the promise of delicious meals that wait on the shelves. As avid hunters, my husband and I have stocked the bounty with a grateful heart: meat, stock, soups and stews…?
A few comments here. Nothing feels as satisfying as going into your pantry and pulling out whole meals you made yourself. My husband and I can everything we can. No electricity to store stuff! And the price of that just keeps going up. We get our meat from a local farm, and there are parts in there we just do not eat. My husband will not eat heart or tongue. When I clean vegetables for supper I keep any peels, or just wonky pieces etc. I throw these in the freezer and when I have enough, I pull out the parts of meat, toss them in a pot with the vegetable parts and make a wonderful broth! This I can up and use like crazy! I have had a few times when canning either method, that I did not have enough to fill the pot, so I can water! It does not cost anything and if there ever is a disaster I have water on hand! If you need the jar, dump the water and you can use it. You are storing the jar anyway. Thank You for the information. It is great to read about others doing what we do. Ymmmy eating!
First I wanna say thanks for all the advice! I am just getting into canning. Even though it has been in my family for years but my great grandma who canned everything from grape jelly to green beans and homemade soup passed away before I was of age to really get in the kitchen and learn the tips of the trade. I was wondering if this can be down using a water bath?
Hi William! Unfortunately no, water bath canning is not safe for the meals. The ingredients are low acid and must be pressure canned. Especially anything with meat – that should always be pressure canned. Believe me I WISH I could water bath can them but since it doesn’t get hot enough, long enough in water bath, I just make sure that my canner is 100% full when I process the meals up. Canning dry pinto beans is one way I make sure the canner is full.
Thank you for the question and I am really glad you’re enjoying the posts!
what is the “safe” shelf life of pressure canned meats and whole meals? Can I use a regular pressure cooker or do we really need the “pressure canner” model?
Hi there! Thanks for the questions.
The safe shelf life assumes that the food is kept in a place that doesn’t have large temperature fluctuations and is dry and dark. 12-24 months is safe. I have a personal preference of 18 months though it’s rare anything lasts that long. My grandmother had a time of three years on her smoked/canned salmon. Check the USDA standards for it and you can also get in touch with your local Cooperative Extension office for more information.
You absolutely must use a pressure canner for meals in a jar. Anything low acid and especially if there is meat involved. See, the reason is because in a pressure canner, the pressure causes there to be a higher temperature inside. High enough to ensure that all bacteria and pathogens are killed off. Then, as the jars cool, the seal is formed and keeps anything from getting into it and spoiling the food.
I cannot stress to you enough the importance of using a pressure canner. PLEASE feel free to ask any questions here, on the Facebook Page, or email me at akhomestead.dreamer@gmail.com. I don’t like the thought of you and yours getting sick. Pressure canning is not difficult at all, it just takes attention to detail and patience. If you are already comfortable using a pressure cooker (on the stove, not electric), then you are far ahead of the game compared to most newbie canners. Many have to get over the fear of it blowing up (because they don’t realize all of the safety features plus the extra effort it would take to make them fail).
This was my first year at pressure canning. I fell in love. I just tasted my first try at making “Ham & Beans” last night for dinner. It came out tasting just like I had slow cooked it all day. I will never go back to the same old way again.
I 100% relate with you on this! I am hooked, maybe even addicted, and am perfectly OK with it. 😉 I was just posting on FB about how we don’t enjoy TV dinners or anything anymore. We taste too many chemicals and ‘food product’ instead of real food. Not getting down on anyone who likes hot pockets or similar (we used to eat them, too!), mind you. We are just so spoiled rotten on the whole, good food made from scratch that anything store bought just tastes funny. Keep it up!
Why is there cloth and a rubber band at the top of the jar?
An excellent question. I don’t know as this is a stock photo I used.
I would wager to say that is not cloth though, too shiny. Looks like wax paper to me.
My opinion is the cloth (or waxed paper) and rubber band are used just for display purposes. Other than making the jars look fancy, it would not serve any purpose as far as preserving the food or making the jars safer as in earthquake zones. When gifting jars of preserved foods, the cloth makes a nice presentation.
Is the 1/3 cup dried beans for a pint jar or quart? I have canned pinto beans before but I always presoak mine so they don’t expand enough and break the jar – but I would much prefer to just dump them in the jar. I have been exposed to canning all my life and helped my Mother but have only been canning sporadically on my own for a couple of years now and there is so much I want to do!
1/3rd cup for a pint. Thanks for following the blog!
Can you pressure can soups that have noodles in them? Also meat sauces?
I would can without the noodles and make them when you’re ready to heat up the goodies instead. If they have meat in them, you will be pressure canning at least 75 minutes and they will turn to mush.
Meat sauces can be done but remember that when pressure canning, any spice you use will be intensified. Best to go light and never can with sage. It make the food very bitter.
Thank you!! How about green pepper soup with rice.
Make the green pepper broth and add rice when ready. From personal experience I can say canning rice is not good. Total mush.
Can I can some baked ziti meatballs with noodles and sauce?
I would say yes to the sauce and meatballs but no noodles. The heat and pressure, especially for the length of time you’d need due to the meat in there, would make the noodles turn to complete mush. Instead, do the sauce and meatballs in the jar and then make noodles on the side. Good luck!
Hi, just a quick question I pressure can my soups after I cook them, can you put the veggies in the pint jars raw and just add the meat and broth prior to canning.
YES! Since you will be canning the jars for at least 75 minutes (because of the meat), raw veggies are a great idea. hey will be fully cooked when done processing!
What about left over meals such as lasagna or beef stew chicken noodles or dumplings. I normally freeze mine. I live Alone and sometimes make large batches. Also I have small pressure cooker with out a thermostat for pressure but will the seventy minutes in a small one be sufficient .
The problem with all of those is the meat requires you to pressure can them for at least 75 minutes. Any dumplings, noodles, rice, etc will be mush at the end. Freezing is better on the leftovers.
What a great idea for a meal. Thanks for sharing on the Waste Less Wednesday Blog Hop!